Blackwork Discovered

pandoras-box

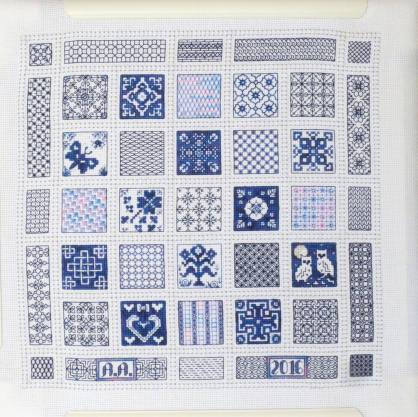
Before you think, what a terrible job of framing, it’s not framed yet, but still in the Q-Snap.  Last year, I rekindled my interest in Cross Stitch, and that soon led to Blackwork. If you’re not familiar with Blackwork, take a look here, or Google “Blackwork embroidery”. Although the name comes from the fact that long ago, it was stitched with only black thread, today’s Blackwork is vastly different.

I loved the uniformity of it, it’s relationship to Cross Stitch, and all the intricate “diaper”  (or filler) patterns.  Curious as to why the stitching within a section was called a diaper pattern, I found this definition:   

    Definition of diaper

  1.  1:  a fabric with a distinctive pattern:a :  a rich silk fabricb :  a soft usually white      linen or cotton fabric used for tablecloths or towels

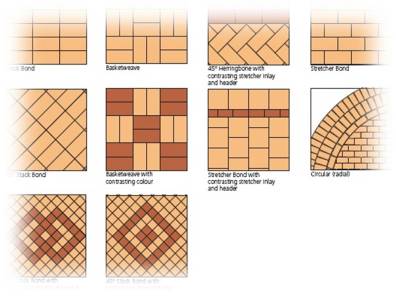
  2. 2:  an allover pattern consisting of one or more small repeated units of design (as geometric figures) connecting with one another or growing out of one another with continuously flowing or straight lines.

Examples of diaper patterns:diaper-patterns

I happened on Blackwork Journey, Elizabeth Almond’s site, and could not believe the fabulous pieces I saw there.  Imagine my delight to find she had oodles and oodles of free patterns I could try.

Never one to start out small, I discovered she was soon hosting a new Stitch a Long (SAL) called Pandora’s Box.  I joined it, and the photo at the top of this post is the result!  This was a case of where the “the journey is as enjoyable as the destination”, as I thoroughly enjoyed the creation of the piece.  Now to get it framed.

Next Blackwork related post will be on the SAL just started!

December CQJP – You Light Up My Life

The last CQJP block design, that of December, came easy for me.  How could you have a Journal Crazy Quilt without December’s block being about Christmas?  However, Christmas is rather low key in Cactus Gardens without any family there.  And even though we are not with them at Christmas, the family is much in our thoughts.

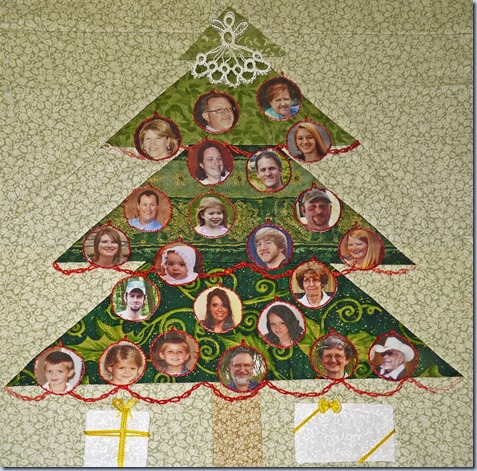
I decided to design a Christmas tree with the family portraits as the ornaments.

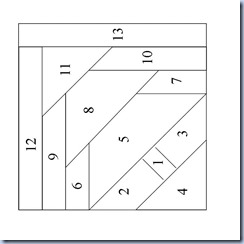
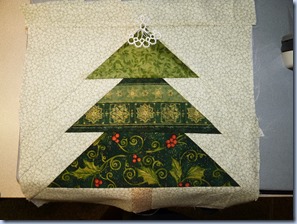
A couple of years ago, I designed a paper pieced pine tree for a quilting project.  With some small modifications, it would become the basic pattern for the tree.

Original pattern, set on diagonal:

pine tree

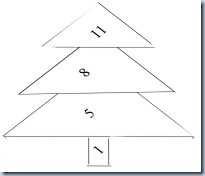
After modifying:

pine tree2_edited4

I had decided to use a tatted angel for the top of the tree, so there had to be another background strip added at the top to provide room.  I chose 3 different green prints for the tree itself, and a lighter green print as a background.

P1310482 

In order to incorporate my white-on-white fabric common to all the blocks, I added two packages under the tree.  The embroidery stitches for the month (TAST) were Knotted Cable Chain, Berry Stitch, and Buttonhole Eyelet.

I used the first as red garlands on the tree, and the others as as the bows on the packages. 

After finding an appropriate photo for each family member, I cropped them into circles using Photoshop Elements, then grouped them together and printed them on Tailor Print ‘n’ Press Transfer paper.

family photos

It took a while to appliqué each of the photos, but I was pleased with the block when finished.

You Light Up My Life (December)

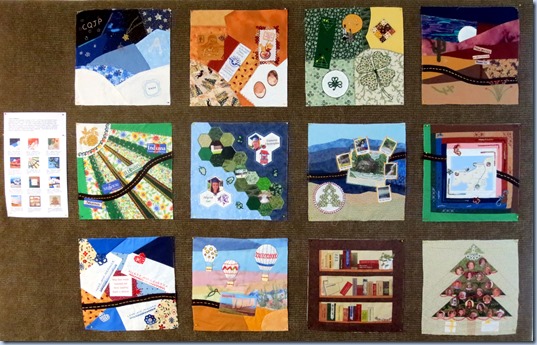
All of the blocks for 2013 CQJP are now complete.  I’m not sure how I will set them together, or whether they will become a wallhanging or a quilt for the bed.  I have thoroughly enjoyed both the CQJP and TAST challenges, and have learned a lot from each.  This is a photo of the blocks together, pinned to a green covered bulletin board in our rec hall.  Keep in mind, they were designed to be 3 columns wide by 4 rows tall.  The bulletin board’s size would not permit me to display them that way.

2013-03-05 - AZ, Yuma - Cactus Gardens Quilt and Art Show -001

November CQJP – Best Loved Tales

As I thought over all the many activities we had engaged in throughout November, I realized it was going to be very hard to choose just a few to highlight for my monthly CQJP block.

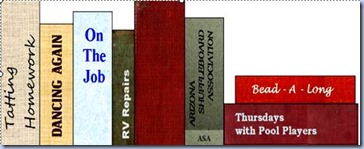
I help keep our small RV park library organized by sorting and shelving books.  As the main librarian had not arrived yet, I spent quite a few of my spare hours in November working there.  It occurred to me that I had seen quilt tops portraying book shelves, why not create a bookshelf for my block, with each book representing a different activity.

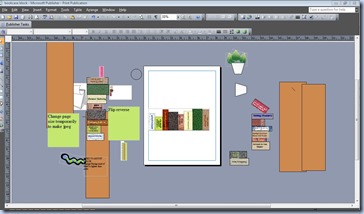
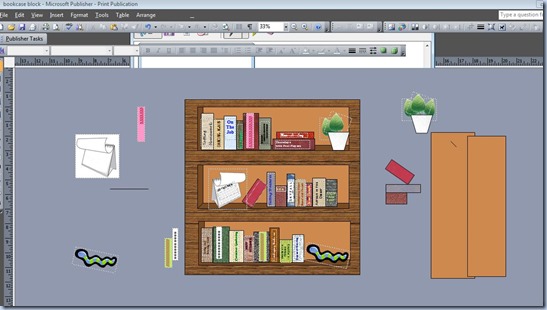
I love computer graphic design, so this became one of my favorite blocks to design.  Here is a screenshot of some of the early planning on MS Publisher.

bookcase planningI searched online for texture images, and used a different one for each book spine.

texture6 texture7 texture11 texture15 

bookcase planning2

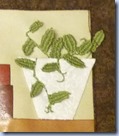
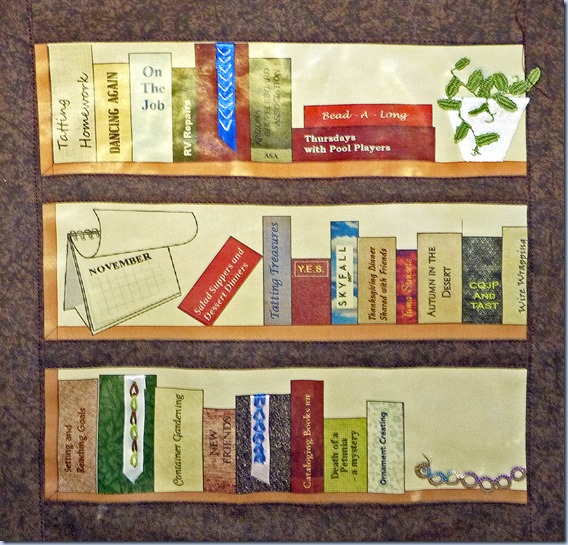
Once I had decided on all the book titles, and laid out the books, I had to decide how to incorporate the TAST stitches for the month, and a piece of tatting.  The tatting was easy, as a book worm came to mind.  For the stitches, the Open Base Needlewoven Picot just had to become leaves, so a potted plant would grace a shelf.  The other stitches, Arrowhead stitch, Portuguese Border Stitch, and Magic Chain Stitch became bookmarks, stitched on separate ribbons.

The final planning screen looked like this:

bookcase planning3

In order to create the fabric block, I first found some fabric with a wood grain like print.  I decided it would be too hard to appliqué the books individually, so I decided to print each shelf on Tailor Print ‘n’ Press Transfer paper, then machine pieced the block with strips of the wood grain fabric.  The flower pot was cut of the white on white material common to each block.  I really liked shaping the plant from the Open Base Woven Picot stitch.

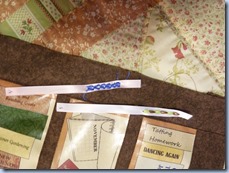
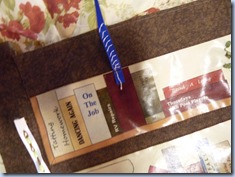
P1310745To make the bookmarks, I cut short lengths of ribbon, stitched with the embroidery stitches, then sewed them to blank book spines at the top with a drop of fabric glue at the bottom of the bookmarks.

P1310736P1310734  

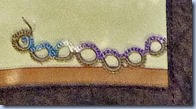
The bookworm is simple tatted rings

Best Loved Tales (November)

And here is the finished block, Best Loved Tales, with titles such as Autumn in the Desert,Thanksgiving Dinner Shared with Friends, New Friends, etc :

Best Loved Tales (November)

October CQJP – Yuma Sunrise

October brought us “home” to Yuma.  In 2007 we sold our place in the country in southern Indiana to live fulltime in an RV.  Our family is beginning to scatter, but many members are still in Indiana.  However, we’ve now spent 7 winters in Yuma, AZ, so it has begun to feel like home as well.

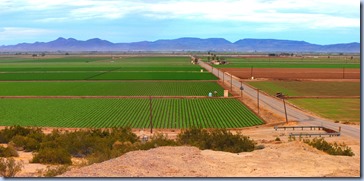
Yuma is a city of contrasts.  RV parks sit next to commercial establishments which exist side by side with the lettuce fields.  Yuma probably grows more lettuce than any other state.

2006-03-02 - AZ, Yuma - Lettuce Fieldsb 

The area is low desert, elevation of 200 feet above sea level, yet is bordered by the foothills to the east.

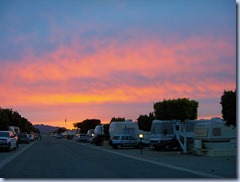
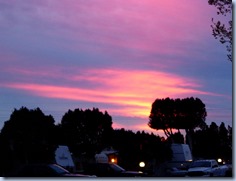
Sunrises and Sunsets can be beautiful. 

2006-03-04 -1- AZ, Yuma - Cactus Gardens - Sunrise  2007-02-11 AZ, Yuma - Sunset

Often at sunrise, you’ll spot hot air balloons in the sky.

I wanted to portray both the foothills and the lettuce fields in my quilt block.  I decided to include hot air balloons as well.

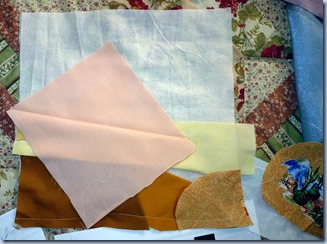
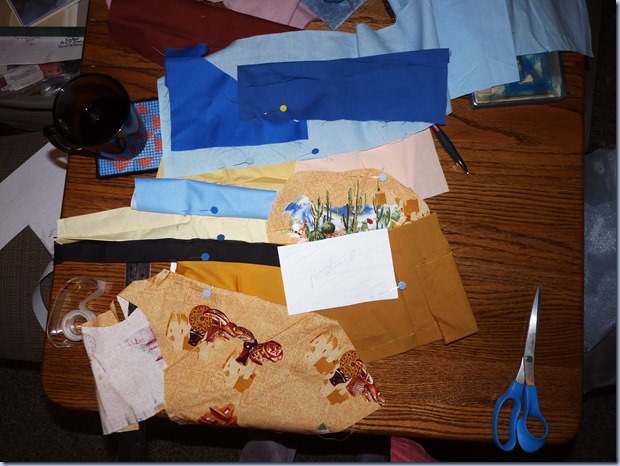
First task, sometimes my hardest, was to choose fabrics.2012 October block (2)

I had thought to do a landscape pattern including the foothills and lettuce fields, but when I began laying it out, there were just too many colors when I included the different shades of green.   I decided to use desert and sunrise colors, but to lay a patch portraying a vintage postcard on top of the block. 

This would be a way to show the lettuce fields with a “Welcome Back to Yuma” theme as well.

Using Photoshop Elements, I created my postcard from two photos I had taken earlier, one of the lettuce fields and one of a sunrise (I used the colors of the sunrise to form the fill for the letters of “Yuma”.  I really enjoy playing with Photoshop.  Once I had the design, I lightened it to “age” it and printed it on Tailor Sew-In Colorfast Sheets

  AZ, Yuma - Lettuce Fields Vintage Postcard old look_edited-2

Here, I’m still choosing among colors and trying to decide how to create a sunrise effect.  I loved the patch with the cacti, but had a hard time deciding how to make it blend in with the other colors. 

2012 October Block-002

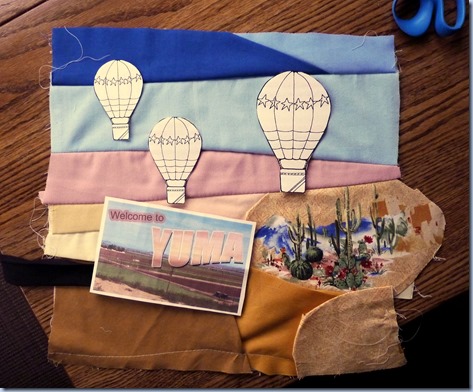
It was now time to design the balloons and decide on their placement.  The highway common to my “travel” blocks would come to an end with our arrival in Yuma.

2012 October block-001 (2)

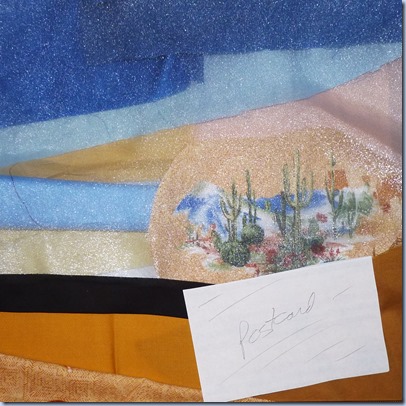
At this point, the colors did not seem to be working well together, and my idea of a sunrise was not coming together.  Trying to decide what I could do to make the fabric colors blend together better, I finally went to the fabric shop and purchased a very sheer apricot organza.  I overlaid it for the top portion of the block, trying to simulate the hazy glow that appears just at the moment of sunrise.  This seemed to be the element I needed to make the block work.  I stitched down the fabrics to the backing.  Here it has not been trimmed at the top yet.

2012 October Block

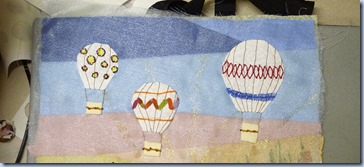
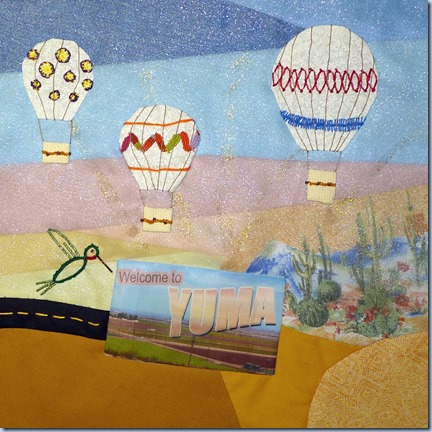
I wanted to include my white-on-white fabric common to all my blocks, so I cut the balloon fabric from it.  For the baskets, I used cream colored Aida cross stitch fabric.  The TAST stitches for the month would create the design on the balloons.  They were Buttonhole Wheel Cups (balloon on left), Closed Base Needlewoven Picot (Balloon center), Italian Border Stitch, Knotted Loop Stitch (both on right balloon), and Beaded Hedebo Stitch (baskets).

October balloonstatted hummingbird for October One more element left to include…some tatting.  After quite a bit of thought, I decided to create a hummingbird.  There are always a few flitting around in our park.  A few beads created it’s luminescent wing.  A little bit of glitter paint created sunrays on the organza.

Finally, Yuma Sunrise was complete.

Yuma Sunrise (October)

September CQJP – The Best Roads Traveled

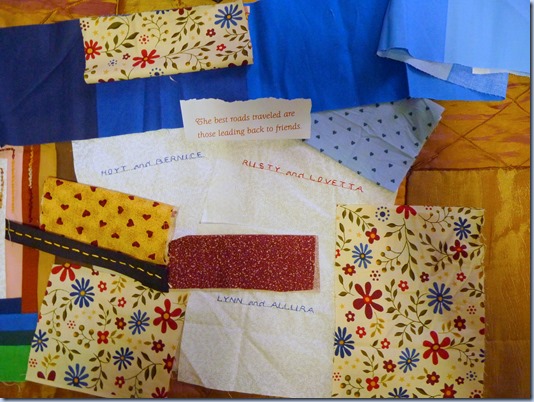
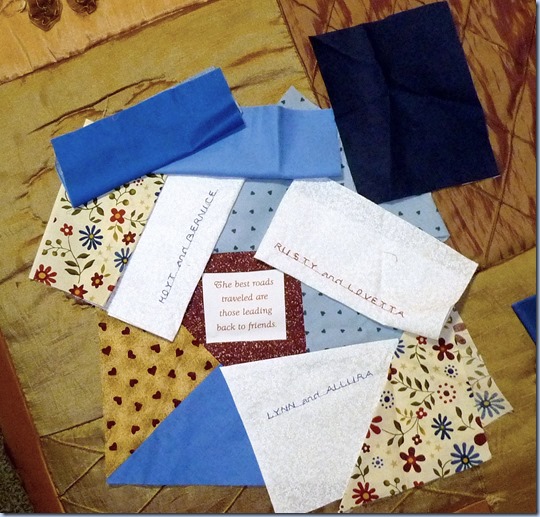
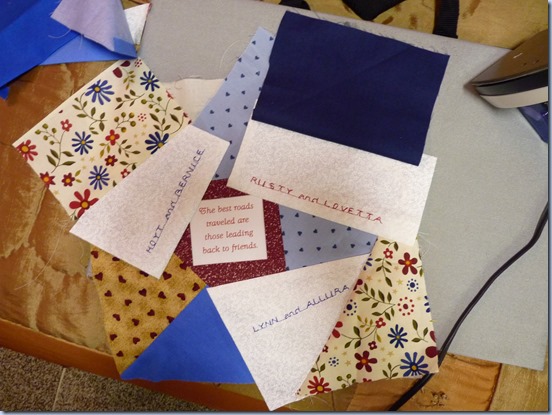
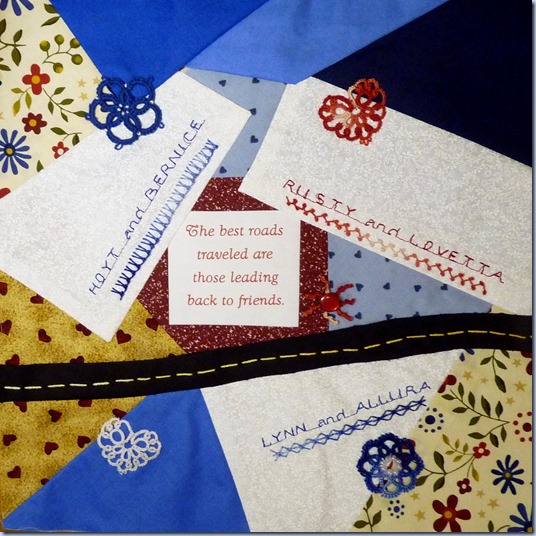
In September, we began the journey west for the autumn/winter season.  We stopped to visit friends, Allura and Lynn in Kansas, joined friends Bernice (also a CQJP and TAST participator) and Hoyt in Oklahoma, and then Bernice and Hoyt traveled with us to join friends, Rusty and Lovetta in New Mexico.  It was a great way to end our summer of travel, so I decided to dedicate the block to the idea, “The Best Roads Traveled Are Those Leading Back to Friends”.

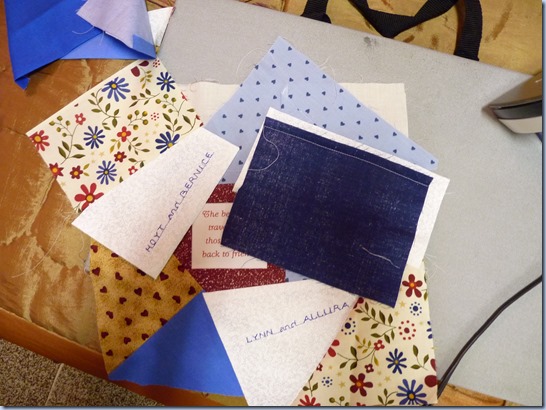
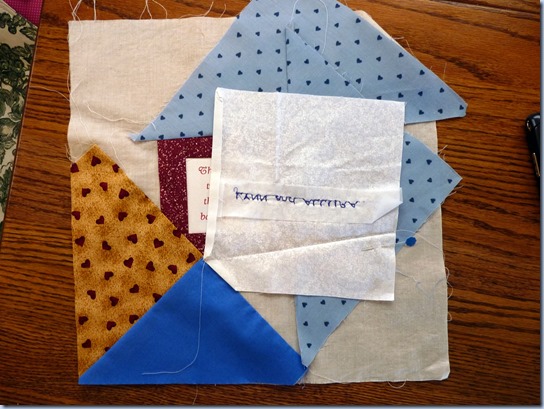
I hadn’t really done a traditional Crazy Quilt block for the project, so that became my pattern.  Here’s a pictorial record of the block construction:

September Block -001

I chose royal blue and cranberry as my colors for the block.

I folded the patches and played with them until I liked the layout.

September Block -001b

Bernice has a sewing machine with an embroidery feature, so she offered to stitch the names for me.

I printed the phrase on Tailor Sew-In Colorfast Sheets.  It was to be my focal point.  I added a border to it, and started with it in the center of the muslin backing.

September Block -002

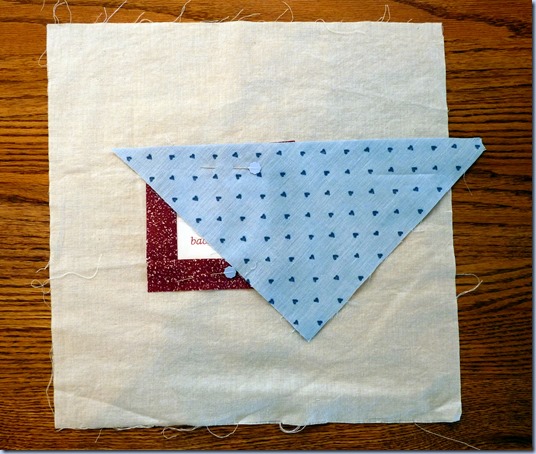
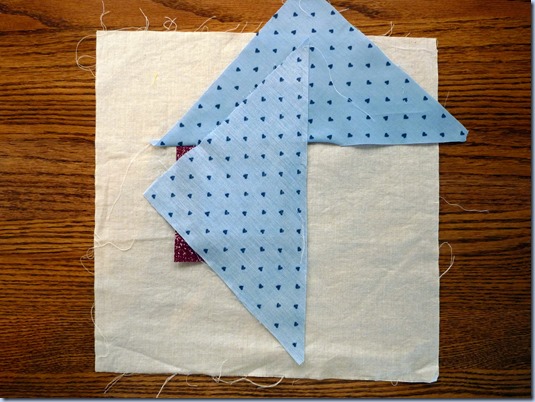
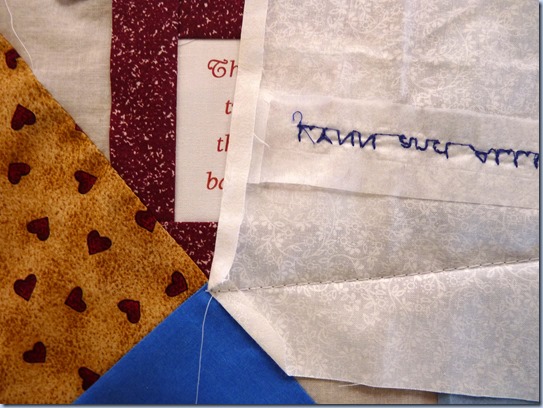
Using a stitch and flip method, I began adding the patches.  Most of the edges could be stitched by machine, but a few angled sides had to be blindstitched down after sewing the block.

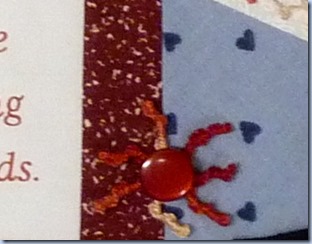
September Block -003September Block -004September Block -005September Block -006 September block -007 September block -008 After the block was stitched and trimmed, it was time to add the tatting and TAST stitches.  In keeping with the floral design of the patches, I used one of the embroidery stitches of the month, the Drizzle stitch to form a flower with a button center.  This was an unusual stitch, and not one I’m likely to use again.

drizzle stitch     

The remaining stitches, sheaf, pistil and knotted buttonhole, I stitched as highlights for the names.

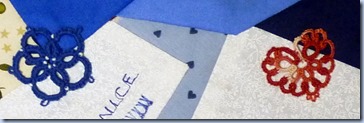
For the tatting accents, I created hearts and flowers from different patterns.

hearts and flowers1 hearts and flowers2

All that was left was to add the highway running through the block.

Best Roads Traveled (September)

While in Oklahoma and New Mexico, we hiked in the Wichita Mountain Wildlife Reserve and  in the El Morro National Monument.  To read the posts about those locations, see our travel blog, Wichita Mountains and El Morro.

August CQJP – On the Road Through the Northeast

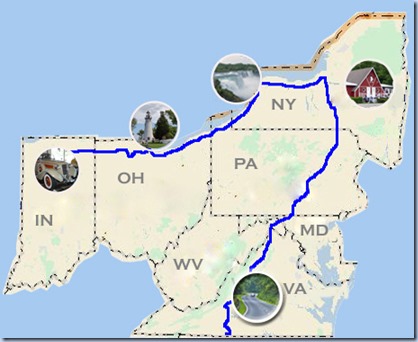
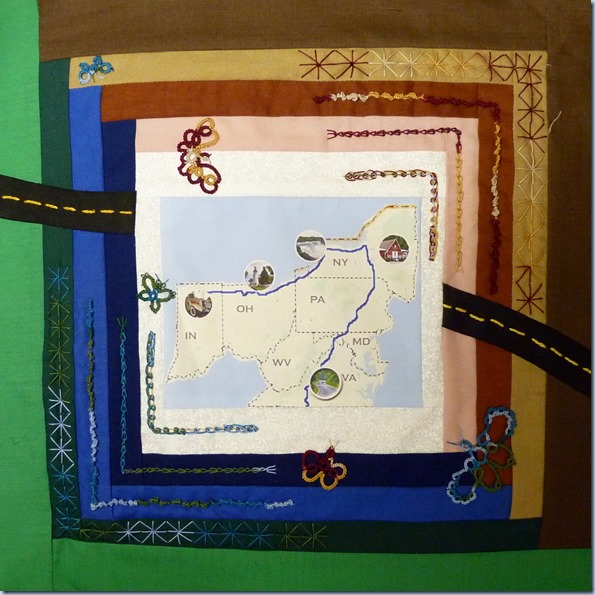
We continued on with our trip into the Northeast.  After finishing the drive on the Blue Ridge Parkway, we continued up along the Skyline Parkway through the Shenandoah National Park.  As we would be covering so many miles through several states, I decided to show our progress on the CQJP block as a map with the highlights pictured.

Using my Delorme Street Atlas and Photoshop, I created the map.

August Map for block The photos are as follows:

Virginia – Skyline Drive;  New York – Country Music Park (where we square danced);  New York – Niagara Falls;  Ohio – Lake Erie; Indiana – Auburn Automobile Museum.

To read about our travels, check our travel blog posts, beginning with the Shenandoah National Park – Skyline Drive, and then continue by  clicking on “newer post”  below each post.

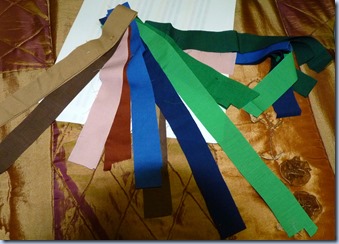
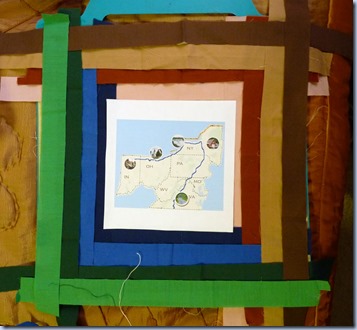
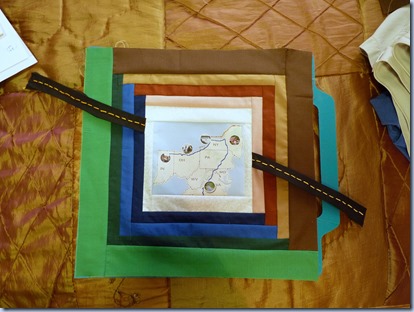
I printed the map on Tailor Print ‘n’ Press Transfer paper and transferred it to cloth.  In order not to detract from the  map with a busy pattern, I chose a simple log cabin design using warm and cool colors from nature.  Once I had several solids chosen, I cut them into inch strips and laid them out in a log cabin design.

2012-10-02- CQJP - September Block Planning 2012-10-02- CQJP - September Block Planning-001

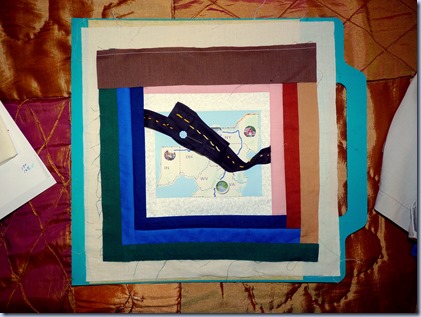
The map was bordered with the white-on-white print common to all of my blocks in the set.

P1290473

Then the highway that has been running through the travel block was sewn in with the first seams.

P1290474 

The August TAST stitches were Algerian Eye, Cast On Stitch, Linked Double Stitch, and Pekinese Stitch.  I worked each one along the bands of color, mirroring each on the opposite corner.  For my tatting this month, I added 5 butterflies from different patterns.August in the Northeast (August)

July TAST and CQJP – in September

Yes, that’s right…  my July block is finished, and I’m only 2 months behind now.   🙂   If you not interested in all the details, you’ll find the photo of the block at the bottom of this post.

If you are a follower of my travel blog, Traveling Dancers, you know that we traveled in the east all summer.  (I’m also behind about a month with posts to it as well).  I didn’t spend as much time on my crafts as usual.

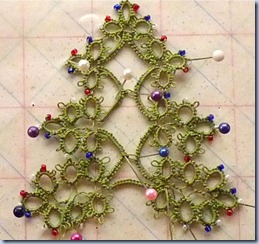
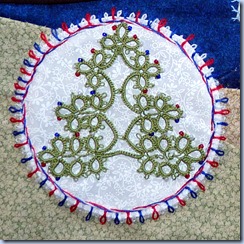
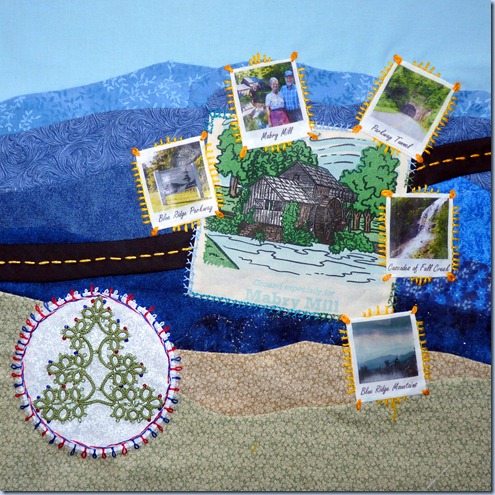
Picture2 Before we left for our summer journey, we had Christmas in July with our family in Indiana.  Had a great time.  My CQJP is meant to be a journal of my year, so Christmas in July had to be a part of the block.  I found the pattern, Tatted Christmas Tree on the Be-Stitched website.  I added red, white and blue beads.  This is the tree on my blocking board.

Now the big job was to design my quilt block.  We traveled the full length of the Blue Ridge Parkway in North Carolina and Virginia, during July and the first of August.  The beautiful mountain scenery had to be my focus.

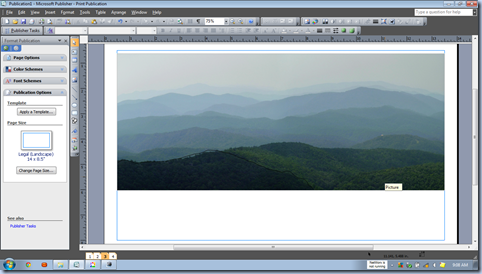
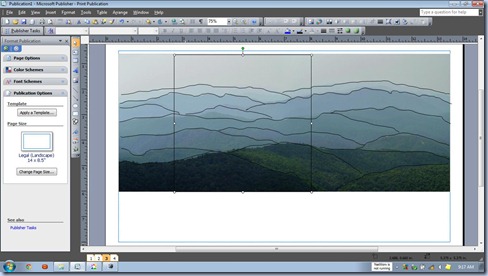
I started with a photo of the mountains.  This is screenshot of the photo inserted into MSPublisher.

photo in Publisher

Next, using the freeform line tool, I sketched over the mountain ranges.  I drew a square box, and moved it over the sketch until I found the section I wanted to portray in the block.

line drawing over photo

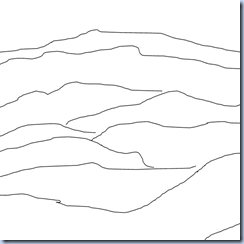
Deleting the photo, I was left with this line drawing for a pattern.

pattern for block

Needing a full size 12.5” pattern, I cropped the drawing into quarters and printed each separately.

drawing a    drawing b

drawing c    drawing d

I taped the four prints together, then traced each segment (reversed) of the pattern onto freezer paper.  I ironed each onto my chosen fabrics allowing 1/4” appliqué seam at the top of each and making sure the bottoms would overlap.

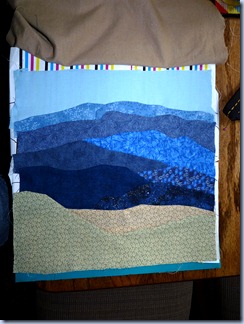
Starting with the top piece, I added each part of the block, appliqueing just the top of each, and then removing the freezer paper.  Leaving the paper gave me an edge to turn under the fabric against, helping to shape the curves.  After the appliquéing was finished, this was my block.

P1270491

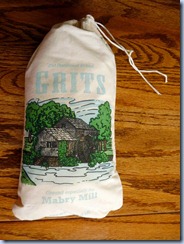
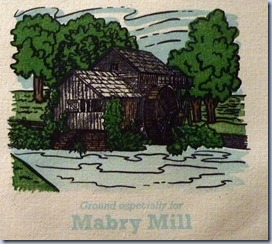
While traveling the Blue Ridge Parkway, one of the stops we enjoyed most was at Mabry Mill.  The site contains a reconstructed pioneer village around the original mill.  The view is so iconic, some states have actually stolen the image for their own advertising.

While there, we purchased a bag of freshly ground grits, one of Ron’s favorite foods.

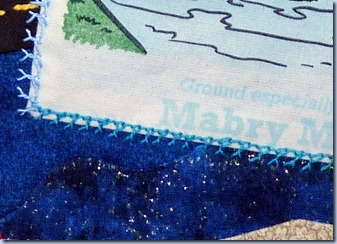
P1250793I noticed the bag was  made of cotton, as  the flour sacks of the early twentieth century.  I thought it would be fun to include it in my block.  After ripping the seams, I colortested it and found that it didn’t fade.  I then cut a rectangle from the front of the bag.

P1250796 

This became the focal point of my block.   Running behind the patch is the “highway” I have used in my months of travel this summer.

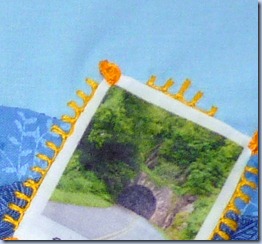
Then, using Picasa, I took 4 photos from the month, and gave them an old Polaroid look.  Using Publisher, I added a script font to each to resemble someone having labeled them by hand.  I then reversed the images and printed the photos on Tailor Print ‘n’ Press Transfer paper.  I wanted this as opposed to the printable fabric, as you can get a glossy look to the transfers, making them look more like real photos.

polaroids

The photos were scattered randomly along the edges of the Mabry Mill patch and appliquéd.  A white on white fabric has been the common factor to all my CQJP blocks.  I cut a circle from it and used it as a background for the tatted Christmas tree.

Finally, I was ready for July’s TAST stitches.  The first, Bonnet Stitch, I used to outline the Mabry Mill section.  I really liked working this stitch.

P1280956

I also really like the Up and Down Buttonhole Stitch.  I used it along the edges of the “Polaroids” and the Oyster Stitch (which I don’t like) on each corner.

P1280956

Finally, the Palestrina stitch was used to create a red, white and blue border around the circle containing the tatted Christmas Tree.  To make it tri-colored, I threaded 3 needles with the threads, then took the stitches alternately.

P1280956

The four stitches are also portrayed in my sampler sections for this month:

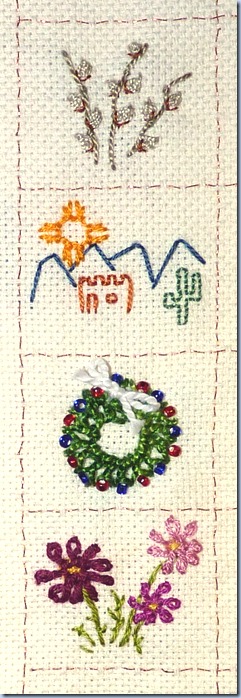
P1290472 pussywillow Oyster Stitch … Pussy Willow catkins are one of the first harbingers of spring.  Bringing a few branches inside always makes the lingering winter days pass quicker.

NM Up and Down Button Hole … although a stitch given in July, by the time I stitched this section, it was September and we were hiking at El Morro, NM.  The stitch seemed perfect to me to stitch  the New Mexico flag symbol.  It is a sun symbol used by the Zia, an ancient Native American people.

wreathI had problems visualizing the Bonnet Stitch in some way related to nature, until I came up with the idea of an evergreen wreath.  And what better way to portray it than with the red, white and blue of our July Christmas?

cosmos2 The Basque Stitch forms the colorful Cosmos, one of the easiest summer blooming annuals to grow in the Northwest.

And finally, July is finished, only a little over 2 months late.  Here is the finished block, “Driving the Blue Ridge Parkway”.

P1280956

June TAST and CQJP

I’ve slipped rather far behind with both the Take A Stitch Tuesday (TAST and Crazy Quilt Journal Project (CQJP) during June and July.  See blog posting just prior to this one to see why I fell behind.

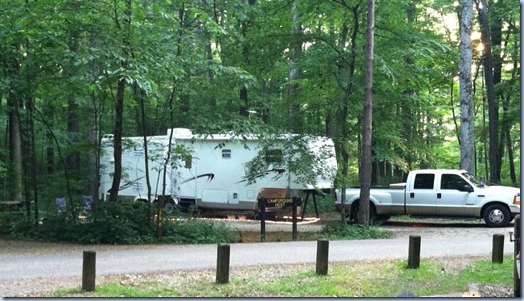
We spent the month of June at McCormick’s Creek State Park in Indiana, volunteering as camphosts (a position we’ve had for the past 5 years).  We also had two major family events in June.  A granddaughter and a grandson both graduated from high school.
us at McCormick's

This is a rather lengthy explanation of how I made this month’s block. If you have come just to see a photo of the completed block, it’s at the very end of this post. If you would like to read about the evolution of the block, read on.

I wanted to commemorate both our stay and the graduations in my crazy quilt block.  I finally decided to divide the block into two halves, one for each graduation and somehow have the park running between the two.  It seemed logical to base the park portion on green tree colors, as our campsite is surrounded by trees.

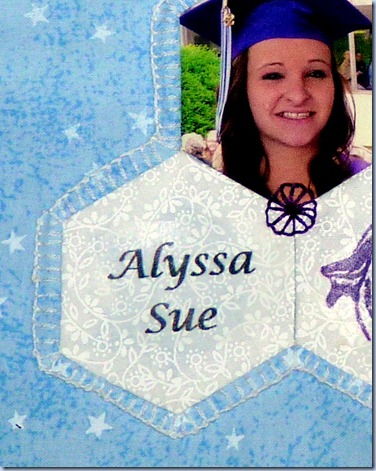
I also wanted to incorporate Alyssa’s school colors, white and purple, and Cameron’s of blue and red, along with their photos, if possible. The question was how to make them all come together?  I finally decided to create a green, leafy mosaic running diagonally down the block and blue on each side.

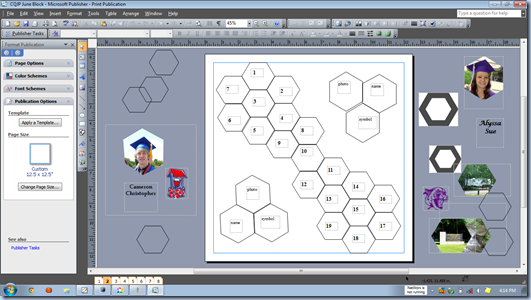
At that point, hexagons seemed to provide an answer.  I could print the kids’ photo, name, and school symbol each on hexagons.  Then I would make the park mosaic from hexagons slightly smaller.  I would include some park photos as well. 

The hardest part of each block for me is always deciding on  the design.  Once I’ve decided, then I really enjoy laying the block out, perhaps even more than its construction.

I used MSPublisher to lay out the block.  I’ve used this program a lot over the years as a quilt design tool.  I found that my 12 1/2” block would hold 18 hexagons in the diagonal part.  The three park photos would be centered. 
image

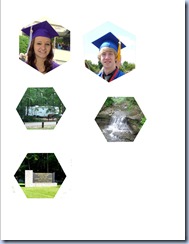
I had often thought of trying English paper piecing.  This seemed like a good time to try it on a smaller scale than most projects.  I could not get the templates for the hexagons sized precisely enough with Publisher, so I switched to Adobe Photoshop Elements to help there.  Once I had the two exact size hexagons, I duplicated them, and printed them on cardstock.  I also used Photoshop Elements to crop the photos into hexagon shapes.

If you need more information on English paper piecing, you will find a detailed tutorial with explanatory photos  at this site:  Hexagon Paper Pieced Tutorial by Janet M. Davies.

I used Tailor Sew-In Colorfast Sheets to print the photos onto cloth.   For the names and school icons, I used Tailor Print-N-Press Transfer Sheets to print them on my white on white fabric (the one fabric common to all my blocks.

hexagons1     hexagons2

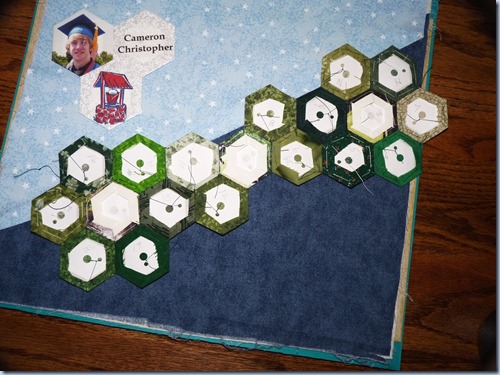
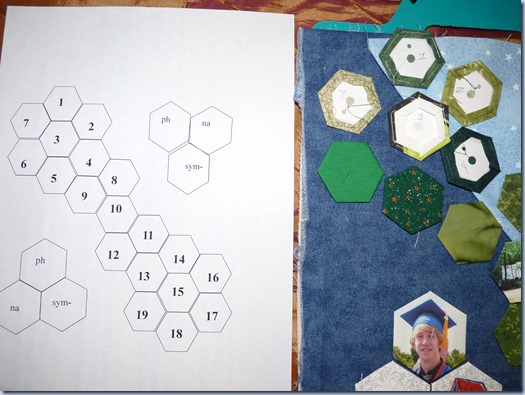
I basted all the individual hexagons to the cardstock forms, then played with the ones for the center until I had them laid out in a pleasing pattern.  Once I saw how I wanted them, I turned them over and numbered the hexagons to correspond with my pattern numbers.   Numbers 3, 10 and 15 would be my park photos.  Then I just pieced them together by number.
P1220940

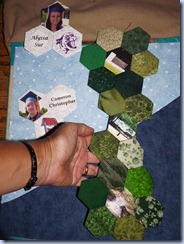
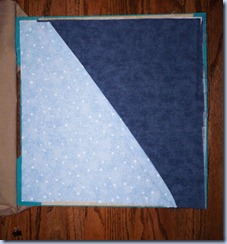
I found a denim look fabric swath to use on Cameron’s side of the block, and a pastel star printed blue for Alyssa’s.  These were basted down to the muslin block base.  Pictured to the right of it is the completed green mosaic and those for the graduations. 
P1240075       P1240077 copy

P1240079

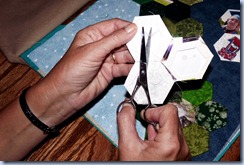
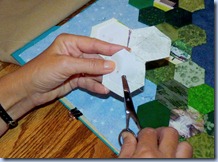
After pressing, I removed the cardstock forms.  Before sewing the fabric to the cardstock, I had punched two holes in each form.  I used these holes for the first stitch as I basted the hexagons to the forms.  This was the only stitch that penetrated the cardstock, so now it was a simple task to cut that stitch, and remove the forms by flipping them out with the closed scissors inserted through the larger hole.
P1240080     P1240083  

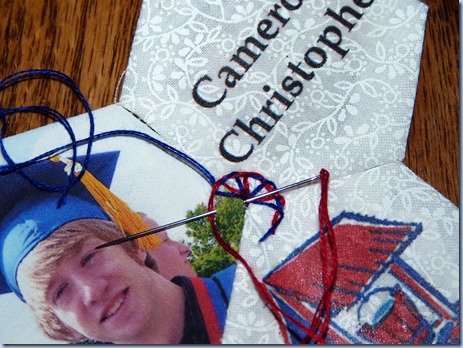
I blindstitched the green mosaic to the block, but before adding the graduation mosaics, I wanted to embroider them with the first TAST stitch of the month, Buttonhole Wheel.  I used it to embellish the center of each three hexagons. Cameron’s presented a bit of a challenge as I wanted to use both red and blue.  I threaded two needles with the colors, and alternated the stitches, simultaneously creating a two buttonhole wheels with the same center.
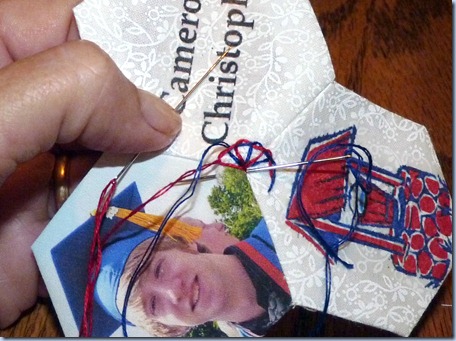
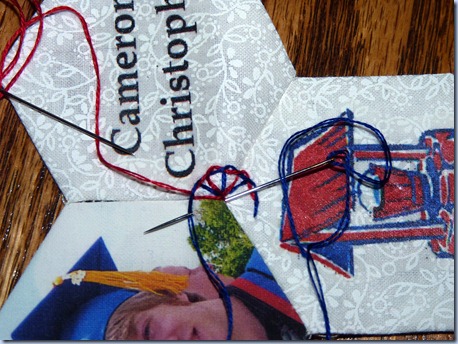
P1240085

P1240094

P1240095

Now I attached the graduation mosaics to each side. 

I also stitch a square to my TAST sampler with each new stitch.  I created hollyhocks with the Buttonhole Wheel, one of my favorite flowers from the past.  Growing up in rural Indiana, every yard had hollyhocks growing, usually around the sides of the outhouse. 🙂   I’m not sure, unless it was just the ladies way of adding a little color and beauty to every corner.  I snapped this photo at the George Rogers Clark National Memorial in Vincennes, IN a few years ago.
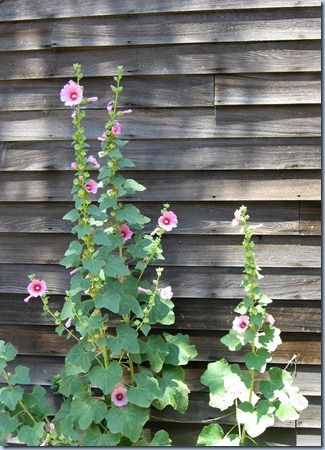
2007-06-21 -2- IN, Vincennes - Indiana First Capitol - Cameron (59) These are my hollyhocks for the sampler:
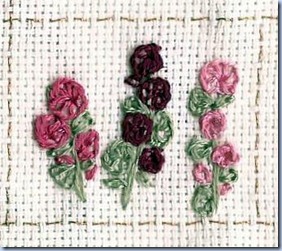
Buttonhole Wheel Stitch Holly Hocks

Back to the quilt block.  The second stitch of the month was the Cable Chain Stitch.  I used a variegated green floss to add the stitch around the perimeter of the center mosaic.
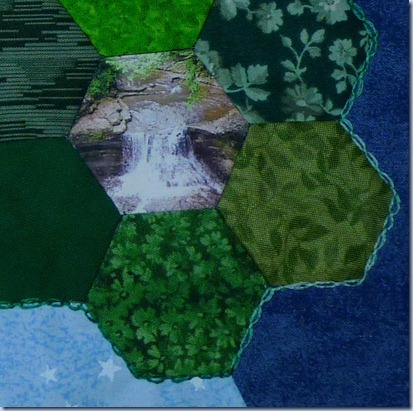
 P1240840 (2)a 

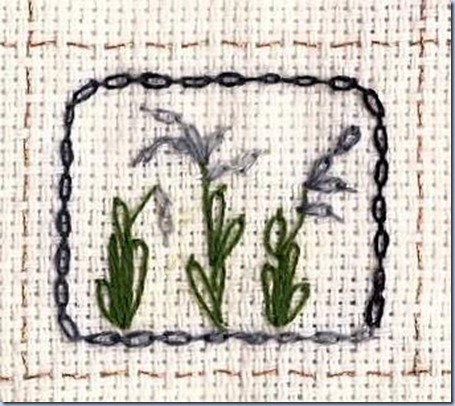
I liked this stitch, and as I added it to the block, I was reminded of a string of beads.  From there, it was easy to decide how to add it to my nature themed TAST sampler.

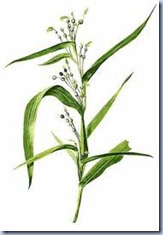
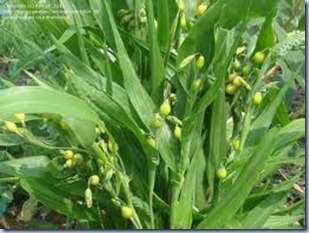
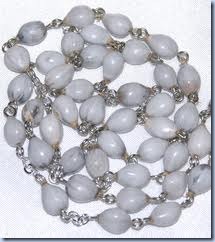
As a child, my mother told me of a “bead plant” that she had grown as a young adult.  She said it produced beads that you could string together and that they would last forever.  She thought the name was “Job’s Tears”.  For years, I searched for the seed, and finally a good friend discovered some at a seed exchange.  Keep in mind, this was a long time before we were all internet users…today it is a simple matter to locate and purchase the seeds.

The plants grew easily in Indiana, looking like fragile cornstalks.  Seeds formed on the top in clusters, and soon dried and hardened on the plant, in varying shades of gray and black. (I’ve taken the following images from the internet, as I don’t have a pictures of the ones I grew.)
images6     images4

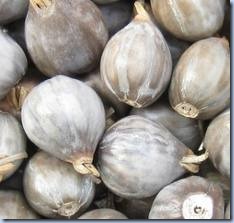
As the seed grew dry enough, you could easily detach them from the vine.  There was a little tuft of growth in one end that easily pulled out, leaving a clean hole through the center.  They truly were beads!

They were pretty in their natural state, but I also sprayed some of them with clear polyurethane when I wanted shiny beads.
images1     images3

But I tend to digress.  Here is my Job’s Tears from the Cable Chain Stitch, including a “necklace” border.
Cable Chain Stitch - Job's Tears Bead Plant

Usually there are 4 new stitches each month, but June included a “catch-up” week, so the third and last stitch of the month was the Palestrina Stitch.  I found this a hard stitch to master, but finally was able to stitch it rather fluidly.  I love the way it adapts itself to corners and turns.

For the block, I used it to create a border around the graduation mosaics.
P1240839b

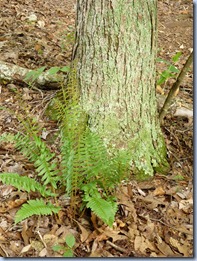
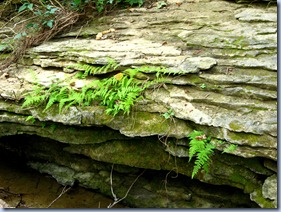
With the ability to curve the stitch line and to vary the length of the “arms” of the stitch made it an ideal stitch to create woodland ferns, another of my favorite plants.   It also fascinates me how a fern can grow seemingly out of the rocks.  The first photo was taken at McCormick’s.  The second near our site this morning.  We are currently camping near the Appalachian Mountains, and the woods are full of ferns.
2008-08-28 - IN, McCormick's Creek State Park - Creek Bed Hike (14)     P1250059

This is my fern from the Palestrina Stitch.
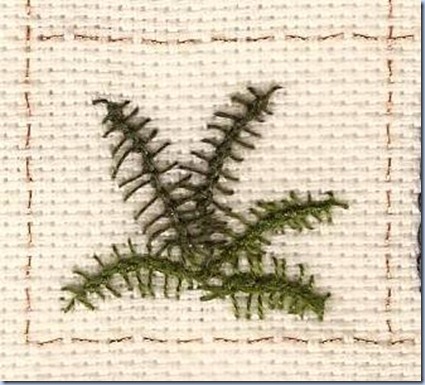
Palestrina Stitch Fern

All that was left was to add some tatting to the block.  Leaves from the pattern, La Feuille Frivole, by J Paulson was the perfect link to tie the center of the blocks with the side.  I tatted 5 and scattered them on the block.
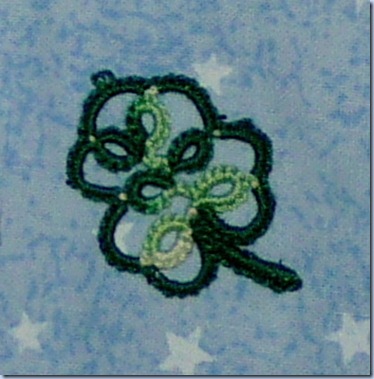
La Feuille Frivole pattern by J. Paulson

And here’s the June completed block “Hosting and Celebrating Family”.
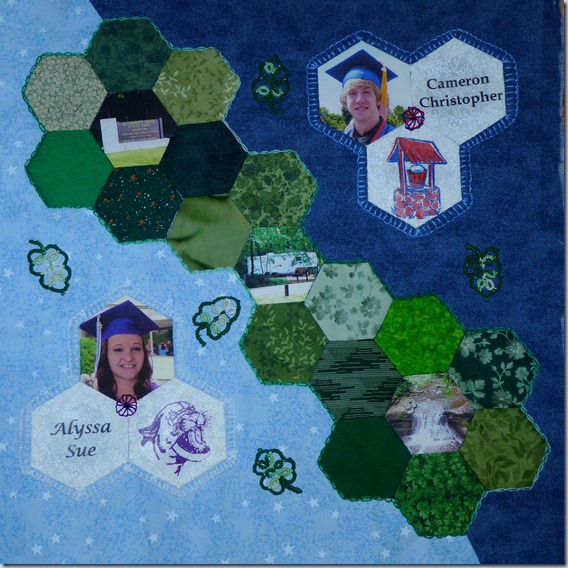
P1240840 (2)

May CQJP and TAST

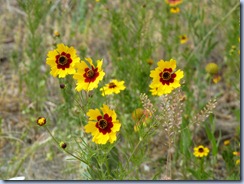
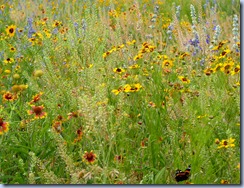
Roadside Flowers

We were on the road again in May.  Spring brings so many wildflowers to our nation’s roadsides, it seemed natural to choose “Roadside Flowers” as my CQJP May theme.

 2012-04-17 TX, On the Road - Wildflowers in Bloom (4)      2012-04-30 - TX, Scenic Drive, Kerrville-Ingram-Bandera (8)


2012-04-30 - TX, Scenic Drive, Kerrville-Ingram-Bandera (1)2012-04-30 - TX, Scenic Drive, Kerrville-Ingram-Bandera (2)    


I originally planned to use many different floral prints, but as I searched for fabrics, they just didn’t seem to coordinate.   I finally chose just two floral prints and 3 shades of green.  I decided to paper piece a fan shape for the block (it seems as if most crazy quilt designs contain random shapes; no matter how I try not to create symmetrically, I seem to keep returning to symmetrical designs), so I laid out the long strips of the  block on paper to use in piecing.

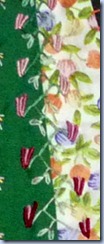
The first TAST stitch of the month, Crossed Buttonhole Stitch was used to embellish the center most seams of the block.  I’ve been surprised to see how decorative variations of the common buttonhole stitch can be.

crossed buttonhole

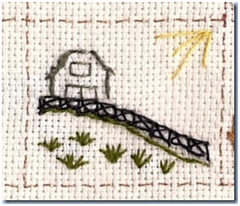
On my TAST Sampler, the stitch became a Crossed Rail Fence.

image 

The next week’s stitch was the Half Chevron, and it embellishes the next two seams on the quilt block.  I like stitching this stitch.

half chevron

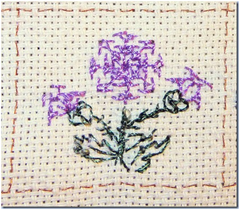
I also used it in a circular pattern to create a purple thistle for my TAST sampler.  My designing of the thistle is described in a prior post.

image

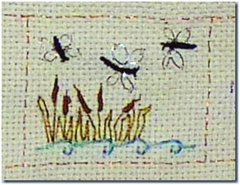
The following week  our TAST group explored stitching the bullion stitch.  I have avoided this stitch in the past, imagining it to be difficult, yet as I began stitching it, I found that I love the shaping and appearance of the stitch.  For the sampler, I created “Dragonflies among the Cattails”

image

On the quilt block, the stitch was used on the next two  seams with a variegated floss.  As I stitched the seams, I envisioned the stitches as flowers hanging from a vine.  However, as I completed the block, it worked better rotated, and the bullion flowers became upturned.

bullion stitch            bullion stitch rotated 

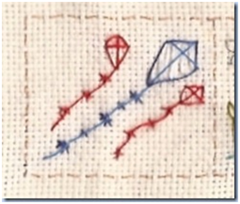
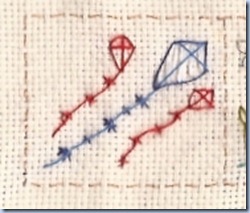
Next came the Butterfly Chain Stitch, a natural for Kites on my TAST Sampler…Why kites on a nature themed sampler?…. What better way to be a part of nature than to be out on a crisp March day in the sun, flying a kite?

One of my best school memories date back to the years when I was in the 5th and 6th grade.  I wasn’t fortunate enough to go to a one room school, but it was close – a “three room school” with two grades per room (and teacher).  On those particular years, our teacher allowed us to bring kites to school, and to fly them in the nearby vacant lot during the lunch hour.  The sky blossomed with kites of every color.

We often took advantage of his good nature, and would make sure the kites were at their highest right before the bell rang to return to class.  Ten to fifteen minutes later, we would breathlessly arrive late to class, (“I got the kite down as ‘quickly’ as possible, honest” ) with very little reprimand forthcoming.  Looking back, I can see that the teacher, seemingly strict in many ways, remembered what it was like to be a kid in springtime.

image

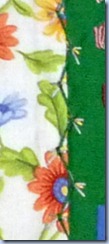
I used the Butterfly Chain Stitch on the next seams of the quilt block, again as flowers, but the blue floss (with yellow centers) I chose to complement the fabric colors, does not show up as well as I’d like.

butterfly chain

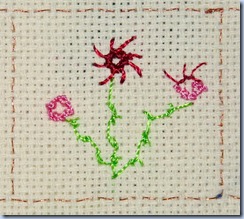
The last week of May brought the Knotted Cretan stitch.  I struggled with this stitch trying to decide how I could incorporate it into my sampler which has a nature theme.  I finally came up with a fantasy pinwheel flower, picturing it in full bloom, budded and partially blooming.

P1220942

For the quilt block, I decided to create a simple  variegated green vine running along the last 2 seams of the flowers.

knotted cretan

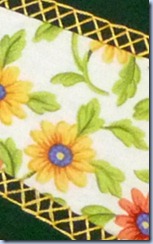
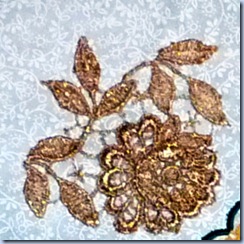
I used the white on white fabric, common to all my blocks for the quarter circle of the “fan”.  It seemed a little plain, so I added a flower from a lace panel Bernice shared with me.
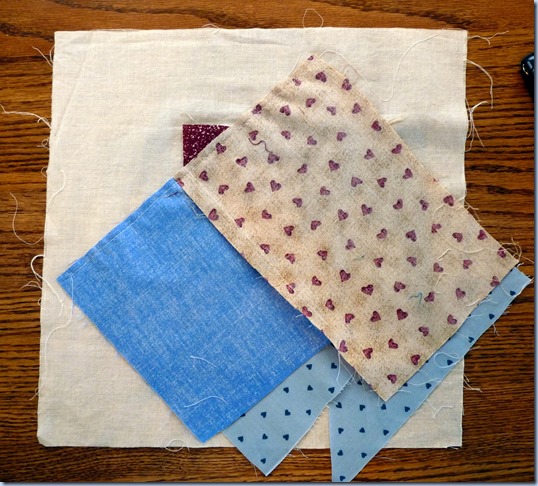
lace panel

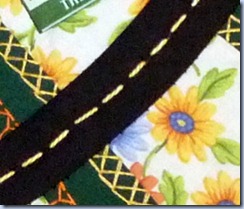
As I had in May, to symbolize our travels, I added a “highway” bias strip to the block.  It was the adding of this element that changed my mind on the orientation of the block, and I turned it 180 degrees from what I originally planned.

highway

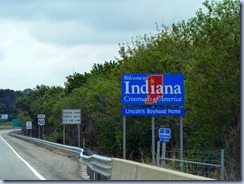
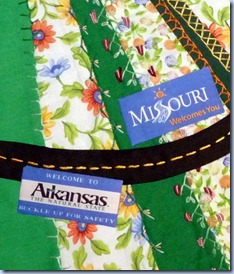
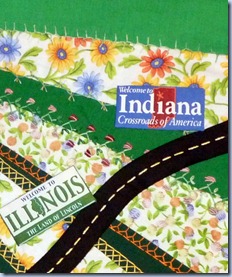
As we entered each state in May, I snapped photos of the Welcome signs. 

P1220594

These became the signs on my quilt block

states1      states2

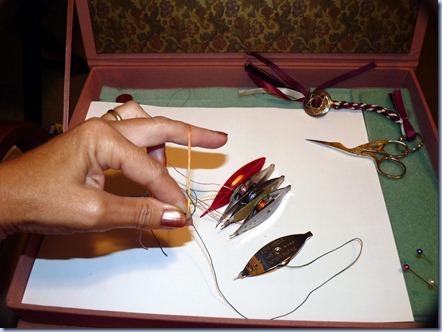
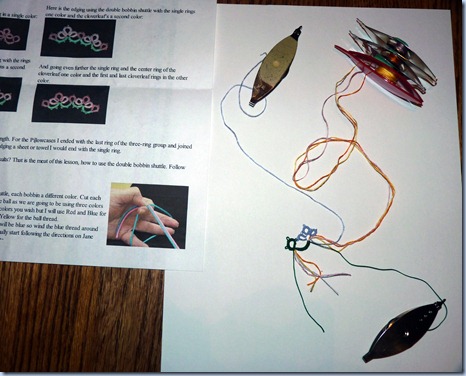
Finally, all that was left to add was a tatted element.  I wanted to use all the floss colors I had embellished the seams with, so I wound 5 bobbins, each with 2 strands of DMC floss.  I used a poster tacky adhesive to stick the 4 flower color bobbins together so they wouldn’t tangle.

.P1220650

I used Sheron Goldin’s pattern, “Mother-In-Law’s Edging” and the same technique as she describes for a double bobbin, except that instead of a double bobbin with 2 thread colors for the flowers, I have 4.

The 4 flower threads are held together and the green bobbin is used to encapsulate them for the core.  In other words, the stitches are not flipped.

P1220651

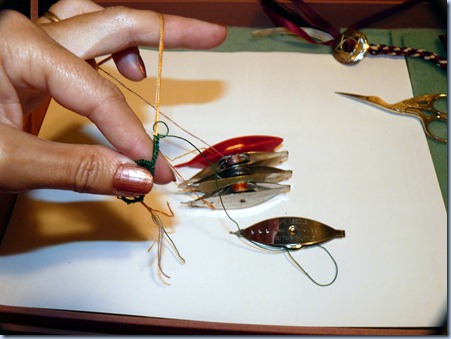
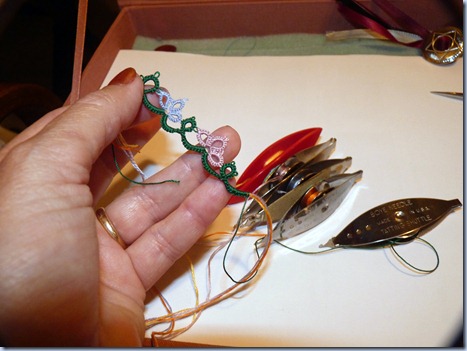
As I came to the place for a flower, I removed the bobbin holding the blue thread from those stuck together, and tatted the flower made of rings.

P1220647

Then, I placed the blue thread bobbin back with the other three, and resumed the encapsulation stitches with the green.   I dropped the 4 flower threads after 12 encapsulation stitches, and added a ring of green between each flower.

Here’s what the edging looked like after a couple of flowers.

P1220652

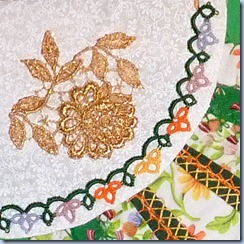
Since my embroidery embellishment was symmetrical on the sides from the center out, I placed the edging colors in the same sequence; here’s the finished tatting.

tatting

I didn’t bother hiding the thread ends, as they will be included in block side seam later.

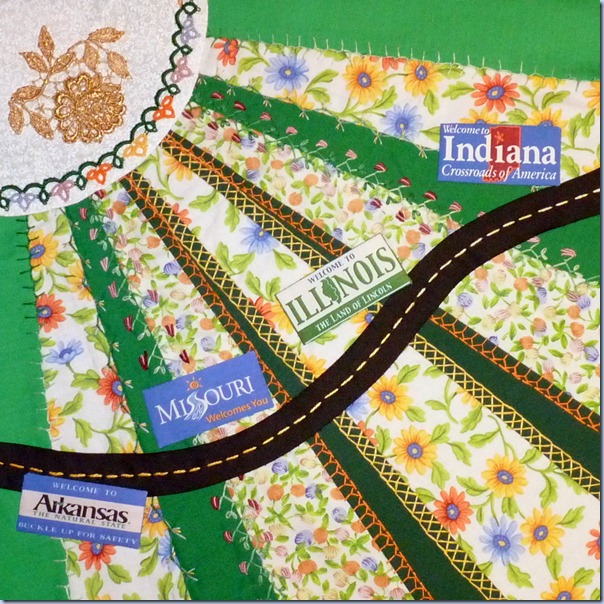
And this is the finished “Roadside Flowers”:

P1220939